Support
Cancellation & Refunds
Booking Amendments
Booking Confirmation
Account Settings
Payments, Invoices & Receipts
Ticketing & Vouchers
Seniors, Students & Children
Get in Contact
White Label Set-Up
Widget Generation
HTML Correspondence Templates
How do I cancel my booking?
Life is unpredictable and we know that you may need to cancel your booking. You can cancel your booking by taking the following steps:
1 – Go to Manage my Booking.
2 – Enter your account credentials.
3 – Navigate to My Bookings.
4 – Select the booking you wish to amend.
5 – Select ‘Cancel my booking’ from the drop-down menu.
6 – Add the reason for cancellation.
7 – Await for cancellation confirmation, usually within 24 hours.
What is the cancellation refund policy?
We require a minimum of 72 hours notice prior to commencement of the activity in order to qualify for a refund. Any bookings cancelled within this time frame will not be eligible for a refund. Refunds are processed through our Stripe payment gateway and require three to five business days to be credited. A refund fee of 5% is applied to reservations.
It should be noted that some operators utilise a no-refund policy regardless of lead-time. This is specified in the ‘Important Information’ tab of activity information.
How do I change the name of a participant?
You can change the name of a participant within 72 hours of commencement of the activity by taking the following steps:
1 – Go to Manage my Booking.
2 – Enter your account credentials.
3 – Navigate to My Bookings.
4 – Select the booking you wish to amend.
5 – Select ‘Change the names on my voucher’ from the dropdown menu.
6 – Advise of the name change, from – to.
7 – Await for amendment confirmation, usually within 24 hours.
How do I change tour options?
You can change activity options within 72 hours of commencement of the activity by taking the following steps:
1 – Go to Manage my Booking.
2 – Enter your account credentials.
3 – Navigate to My Bookings.
4 – Select the booking you wish to amend.
5 – Select ‘Change tour option’ from the dropdown menu.
6 – Advise of the change, from – to.
7 – Await for amendment confirmation, usually within 24 hours.
How do I change the date of my booking?
You can change activity date within 72 hours of commencement of the activity by taking the following steps:
1 – Go to Manage my Booking.
2 – Enter your account credentials.
3 – Navigate to My Bookings.
4 – Select the booking you wish to amend.
5 – Select ‘Change the date of my booking’ from the dropdown menu.
6 – Advise of the change, from – to.
7 – Await for amendment confirmation, usually within 24 hours.
How do I get in touch with the tour operator?
Contact details for the local tour operator can be found on your Ticket under the heading Important Information.
You can also access your ticket or voucher by taking the following steps:
1 – Click Manage my Booking.
2 – Enter your email and password as prompted.
3 – Click on ‘My Bookings’.
4 – Navigate to the appropriate booking.
5 – Click on ‘View Voucher’.
Why have I not yet received booking confirmation?
Confirmation is typically received within 48 hours of booking, subject to availability. Once confirmation is received from the operator, a second email is sent with either confirmation or notice that the tour is unavailable for your requested time/date.
A tour may return unavailable due to a few different reasons including:
1 – The tour date or time requested is no longer available.
2 – Unforeseen circumstances including weather.
Tours rejected by the operator will generally be refunded immediately. However, if we have e-mailed you with options for this tour, we may not begin the refund process until we hear back from you concerning those options.
Please always be sure to reply as soon as possible with what you would like to do with your tour to give our agents the maximum amount of time to assist you.
How do I create an account?
Setting up an account with Hero Explorer is easy with the following steps:
1 – Click Register.
2 – Enter your email and password, simple as that!
3 – You may be required to verify your account if you have not set up a password, simply follow the verification steps as prompted.
How do I manage my booking?
Managing your booking with Hero Explorer is easy with the following steps:
1 – Click Manage my Booking.
2 – Enter your email and password as prompted.
3 – Click on ‘My Bookings’.
4 – Navigate to the appropriate booking.
5 – Select from the range of options available.
How do I reset my password?
Resetting your password with Hero Explorer is easy with the following steps:
1 – Click Manage my Booking.
2 – Click on ‘Forgot your password’.
3 – Enter your email address and Click ‘Reset Password’.
4 – Await reset password email to your nominated inbox.
5 – Follow instructions from your reset password email.
How do I deactivate my account?
We are sorry to see you go but understand this happens. Deactivating your account with Hero Explorer is easy with the following steps:
1 – Send an email to hello@heroexplorer.com.
2 – Include ‘Deactivate Account’ in the subject line.
3 – Thats it, you will not hear from us again!
Where do I get an invoice or receipt for my booking?
A receipt for your booking is automatically issued to your email address upon completion of the payment transaction. If you require details of your booking, take the following steps:
1 – Click Manage my Booking on the lower menu/footer.
2 – Enter your email and password as prompted.
3 – Click on ‘My Bookings’.
4 – Navigate to the appropriate booking.
Where can I find my ticket or voucher?
A ticket or voucher print option is presented at the end of the booking process. If you have misplaced your ticket or voucher, fret not! You can access your ticket or voucher by taking the following steps:
1 – Click Manage my Booking.
2 – Enter your email and password as prompted.
3 – Click on ‘My Bookings’.
4 – Navigate to the appropriate booking.
5 – Click on ‘View Voucher’.
Do you offer special pricing for seniors, students and children?
Special pricing is only available when there is a promotion offered by the suppliers. Hero Explorer periodically offer discounts to registered subscribers. Once you subscribe to Hero Explorer, you will be notified through email for updates and promotional availabilities.
Are there identification requirements?
Generally, only the lead participant will require their identification. If every passenger in the party requires a separate ticket, each passenger may require their own identification also.
For security reasons, you will be required to have an identification that matches the name you used when you booked the activity.
Important information is provided by tour operators and can be accessed on the ticket or by taking the following steps:
1 – Click Manage my Booking.
2 – Enter your email and password as prompted.
3 – Click on ‘My Bookings’.
4 – Navigate to the appropriate booking.
5 – Click on ‘View Voucher’ to access important tour information.
How do I get in touch with the tour operator?
Generally, only the lead participant will require their identification. If every passenger in the party requires a separate ticket, each passenger may require their own identification also.
For security reasons, you will be required to have an identification that matches the name you used when you booked the activity.
Important information is provided by tour operators and can be accessed on the ticket or by taking the following steps:
1 – Click Manage my Booking.
2 – Enter your email and password as prompted.
3 – Click on ‘My Bookings’.
4 – Navigate to the appropriate booking.
5 – Click on ‘View Voucher’ to access important tour information.
How do I get in touch with Hero Explorer?
Our platform is designed to address most of your queries online through the Manage my Booking portal and includes cancellations, amendments, changing tour options, changing participants, booking confirmation, vouchers, tickets and account settings.
This can be accessed by taking the following steps:
1 – Click Manage my Booking.
2 – Enter your email and password as prompted.
3 – Click on ‘My Bookings’.
4 – Navigate to the appropriate booking.
5 – Select the option that is appropriate and follow the instructions.
You are our our number one priority. You can email our support team direct on hello@heroexplorer.com. Please include in the email the following details:
– Hero Explorer Reference ID (Itinerary ID).
– Lead Passenger Name/Details.
– Detail of the query.
If you wish to talk to us direct, we operate customer service hours between 8.30am and 4.30pm Australian Eastern Standard Time (AEST) and can be contacted on +617 4763 0295.
How do I set up a white-label account of Hero Explorer to start earning commission by referring tours and activities?
Setting up a white-label account of Hero Explorer is easy. Simply complete the form on this page and you will receive your log-in credentials instantaneously via email.
You can then log into the admin portal here to configure your white-label by navigating to the ‘White-Label’ tab.
How do I configure the white-label to refelct my brand and style?
The admin portal to configure your white-label tours and activity site can be accessed by entering the credentials supplied upon sign-up here.
Upon first login, you will be prompted to change your password. Once complete, click on the ‘White Label’ tab to configure your brand and style with the following steps:
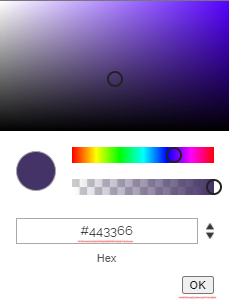
1 – Enter the primary and secondary colour codes of your colour palatte and click ‘OK’.
2 – Choose the style of button to match your site by selecting a square or rounded theme.
3 – Upload or drag-and-drop your logo with an ideal size of 300px (w) x 100px (h).
4 – Adjust the width and height of your logo if required.
5 – Click on ‘Save’ to set your brand and style parameters.
6 – Click on the logo in the top-left corner to preview your white-label settings.
7 – To re-adjust, Click ‘My Profile’ to return to the admin portal.
Visual Guide - How do I configure the white-label to reflect my brand and style?
1 – Within the admin portal, navigate to the ‘White-Label’ tab.

2 – Enter the primary and secondary colour codes of your colour palatte and click ‘OK’.
3 – Choose the style of button to match your site by selecting a square or rounded theme.

4 – Upload or drag-and-drop your logo with an ideal size of 300px (w) x 100px (h).
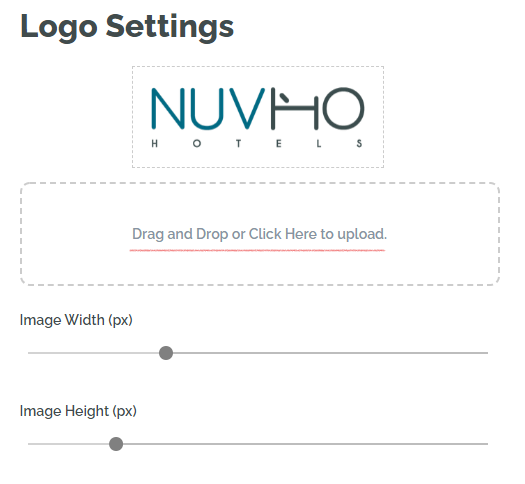
5 – Adjust the width and height of your logo if required.
6 – Click on ‘Save’ to set your brand and style parameters.

7 – Click on the logo in the top-left corner to navigate to the homepage to preview your white-label settings.
8 – To re-adjust, Click ‘My Profile’ to return to the admin portal.
How do I generate a customised tours and activities search widget that can be installed within my website environment?
Hero Explorer can supply a free search widget that can be installed to any third party web environment. The search widget comprises a search bar and drop-down menu of destinations and attractions. The search widget code is generated by entering your custom parameters, which can be pasted into your website environment to create the search widget.
Custom search parameters can include destinations or products, which are prompted upon search commencement. The drop-down search menu can be customised in terms of destinations, attractions and style.
Custom code for the search widget can be generated here by selecting ‘Search Widget Generator’ and undertaking the following steps:
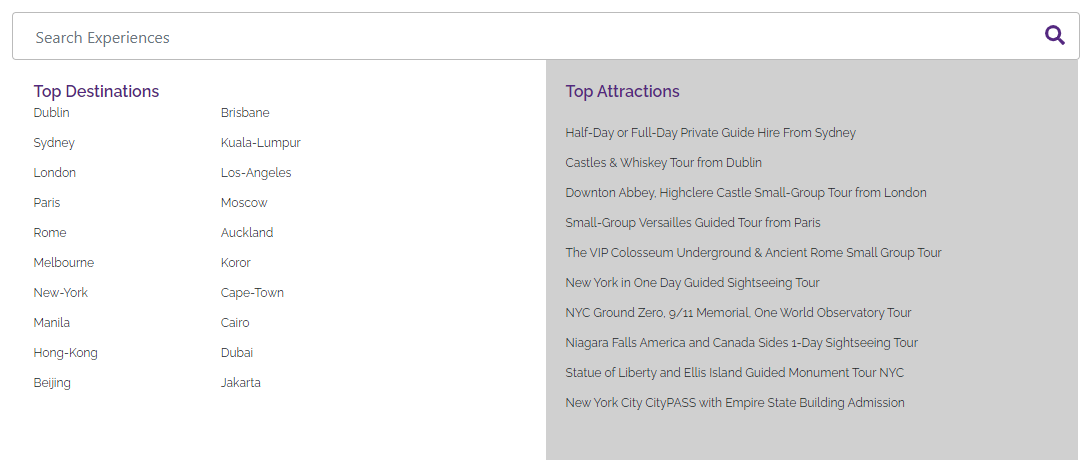
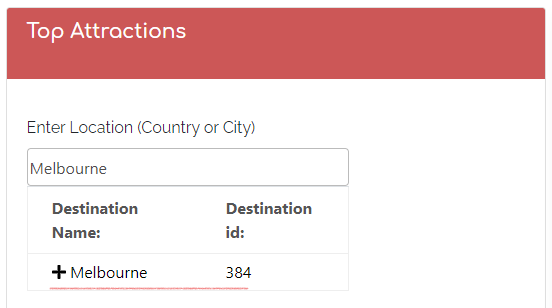
1- The output of the search widget comprises a search bar and drop-down menu of destinations and attractions.
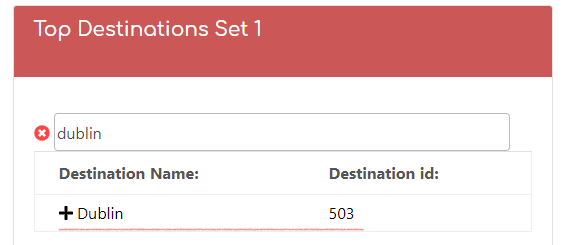
2 – In ‘Top Destinations Set 1’, enter your desired destination. If your desired destination is present, you will be prompted to select. If it is not present, select an alternative destination. It should be noted that all destinations with more than one word should be hyphenated. For example, for New York, enter ‘New-York’.
3 – Repeat Step 1 until all destinations are populated. Code will not be generated until all fields are completed.
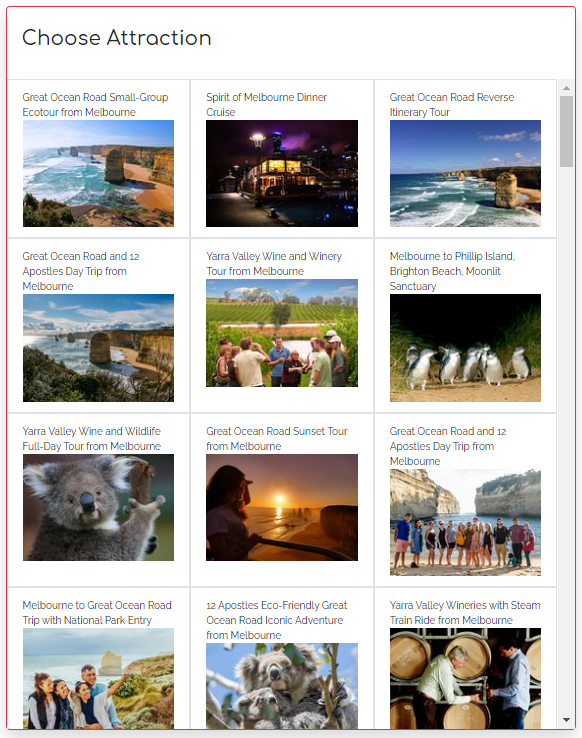
4 – In ‘Top Attractions’, enter and select your primary destination. This will populate the ‘Choose Attraction’ section with a range of products, specific to that destination. If your destination is not present, it will not be prompted. Select an alternative destination.
5 – Click, in order of preference, the ‘Top Attractions’ you wish to include on the search widget.
6 – Customise the search widget in terms of colour and font as well as enter the supplied sub-domain.
7 – Once you are satisfied with the style, click ‘Generate Code’ and then copy your custom code to your website environment.
Visual Guide - How do I generate a customised tours and activities search widget that can be installed within my website environment?
1- The output of the search widget comprises a search bar and drop-down menu of destinations and attractions. Set 1 comprises the first column of ‘Top Destinations’ and Set 2 comprises the second column.
2 – In ‘Top Destinations Set 1’, enter your desired destination. If your desired destination is present, you will be prompted to select. If it is not present, select an alternative destination. It should be noted that all destinations with more than one word should be hyphenated. For example, for New York, enter ‘New-York’.
3 – Repeat Step 1 until all destinations are populated in both Set 1 & 2. Code will not be generated until all fields are completed.
4 – In ‘Top Attractions’, enter and select your primary destination. This will populate the ‘Choose Attraction’ section with a range of products, specific to that destination. If your destination is not present, it will not be prompted. Select an alternative destination.
5 – Click, in order of preference, the ‘Top Attractions’ you wish to include on the search widget.
6 – Customise the search widget in terms of colour and font as well as enter the supplied sub-domain.

7 – Once you are satisfied with the style, click ‘Generate Code’ and then copy your custom code to your website environment.

How do I generate a customised tours and activities product widget that can be installed within my website environment?
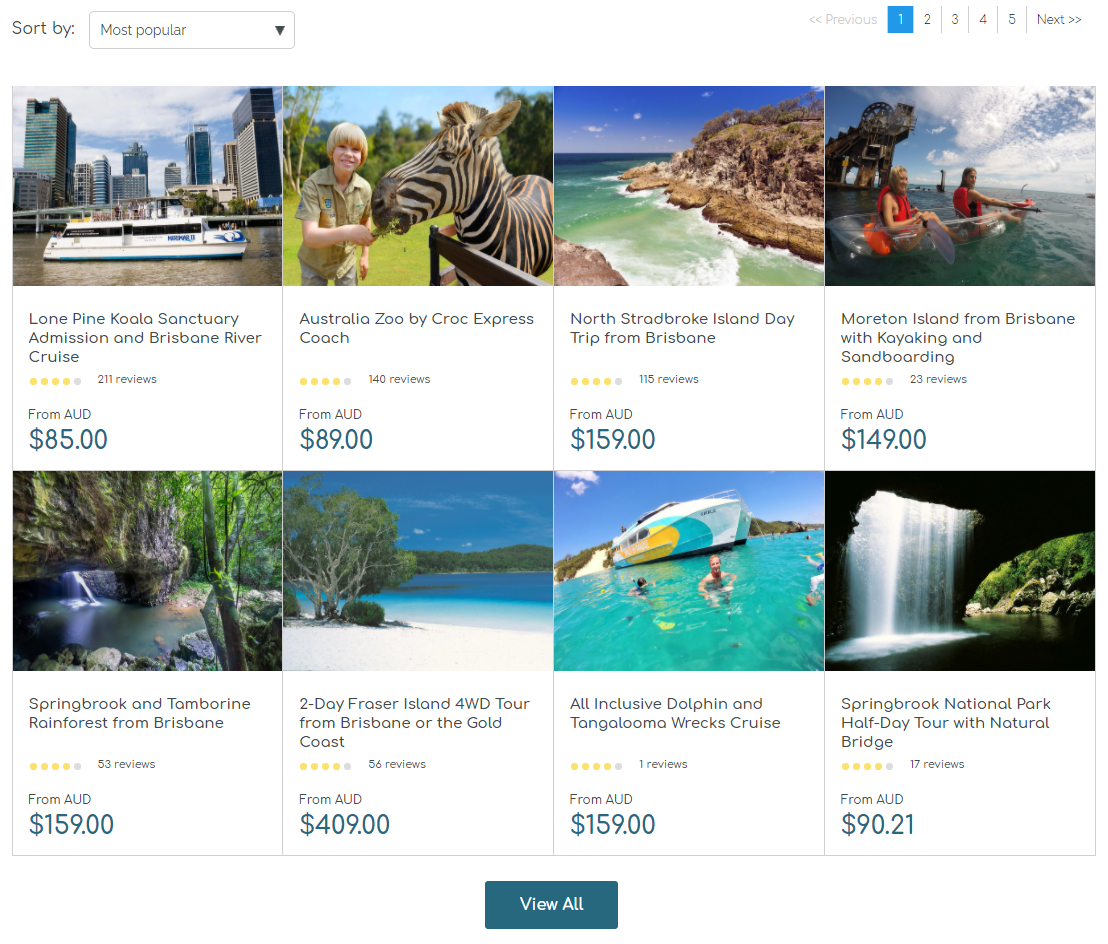
Hero Explorer can supply a free product widget that can be installed to any third party web environment. The product widget comprises a live preview of products available in your selected destination including product image, name, rating and price. The product widget code is generated by entering your custom parameters, which can be pasted into your website environment to create the product widget.
Custom parameters include destination and styling options. Code for the search widget can be generated here by selecting ‘Product Widget Generator’ and undertaking the following steps:
1 – The output of the product widget comprises a live preview of products available in your selected destination including product image, name, rating and price.
2 – In the ‘Enter Destinations’ field, enter your desired destination. If your desired destination is present, you will be prompted to select. If it is not present, select an alternative destination. It should be noted that all destinations with more than one word should be hyphenated. For example, for New York, enter New-York. Once your destination is selected, a ‘Product Widget Preview’ window is populated.
3 – Change your custom parameters to match that of your website styling. Custom parameters include button colour, text colour, price colour, sub-domain, font, currency and border radius.
4 – Click ‘Apply Changes’ to preview your product widget. Repeat the steps until the desired style is achieved.
5 – Copy the generated code and paste within your website environment.
Visual Guide - How do I generate a customised tours and activities product widget that can be installed within my website environment?
1 – The output of the product widget comprises a live preview of products available in your selected destination including product image, name, rating and price with a button to ‘View All’.
2 – In the ‘Enter Destinations’ field, enter your desired destination. If your desired destination is present, you will be prompted to select. If it is not present, select an alternative destination. It should be noted that all destinations with more than one word should be hyphenated. For example, for New York, enter New-York. Once your destination is selected, a ‘Product Widget Preview’ window is populated.
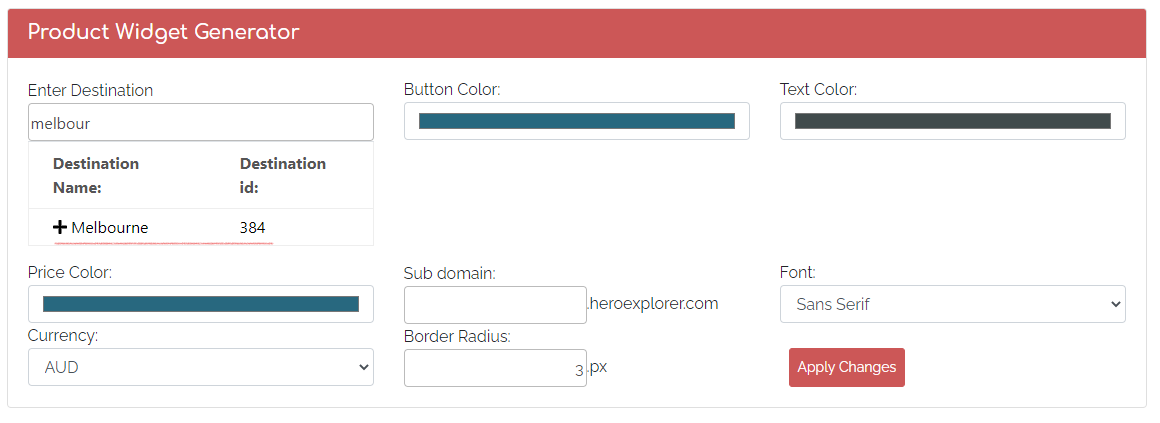
3 – Change your custom parameters to match that of your website styling. Custom parameters include button colour, text colour, price colour, sub-domain, font, currency and border radius.
4 – Click ‘Apply Changes’ to preview your product widget. Repeat the steps until the desired style is achieved.
5 – Copy the generated code and paste within your website environment.
How do I generate a a base HTML correspondance template to use within RMS?
Hero Explorer supply base HTML templates for booking confirmation, pre-stay and post-stay correspondance. These templates can be imported and edited within the RMS environment.
The templates can be customised within the RMS HTML Editor by replacing the header, footer and other images with artwork specific to your brand and style. Associated links to the images can also be updated to reflect your environment. An RMS guide to creation of HTML Form Letters can be found here.
To import the HTML templates to the RMS environment, take the following steps:
1 – Select the HTML template you wish to import to RMS here.
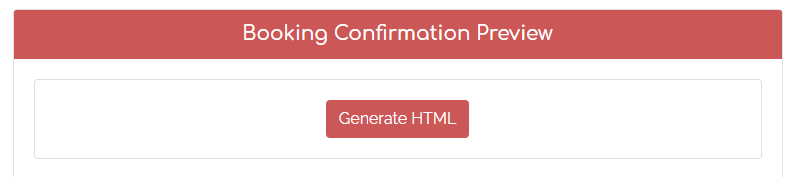
2 – Choose from ‘Booking Conformation Template’, ‘Pre-Stay Email’ or ‘Post-Stay Email’.
3 – Click ‘Generate HTML’
4 – Copy the generated code.
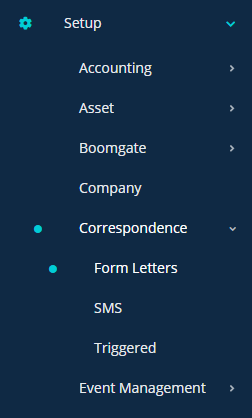
5 – Within RMS, navigate to Setup/Correspondance/Form Letters.
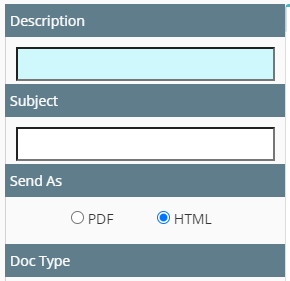
6 – Click ‘Add’, populate the ‘Description’ and ‘Subject’ fields and select ‘HTML’.
7 – Click on the ‘Source’ button within the editor.
8 – Paste the code.
9 – Click on the ‘Source’ button again to preview.
10 – Use the editor to make changes to the base HTML template.
Visual Guide - How do I generate a a base HTML correspondance template to use within RMS?
1 – Select the HTML template you wish to import to RMS here.

2 – Choose from ‘Booking Confirmation Template’, ‘Pre-Stay Email’ or ‘Post-Stay Email’.
3 – Click ‘Generate HTML’
4 – Copy the generated code.
5 – Within RMS, navigate to Setup/Correspondance/Form Letters.
6 – Click ‘Add’, populate the ‘Description’ and ‘Subject’ fields and select ‘HTML’.

7 – Click on the ‘Source’ button within the editor.

8 – Paste the code.
9 – Click on the ‘Source’ button again to preview.
10 – Use the editor to make changes to the base HTML template.